WARNING! What follows is a fairly technical discussion on how I do what I do. I’ve done my best to keep things simple but there’s still some basic understanding of building up a drawing using layers and their opacity that you need to understand for it all to make sense.
Getting Started
Every car I draw presents its own special set of challenges. Sometimes it’s a lack of accurate background information. Sometimes it’s the absence of usable photographic records. Occasionally, with the more popular cars, it can actually be separating the facts from the myths. With the Gurney/Foyt Le Mans winning Ford GT40 MK IV none of those things is true. There is an ample photographic record including numerous in-race images as well as the superbly accurate collection housed at the Henry Ford Museum. There are even a decent number of images available from when the GT40 MKIV was being developed as well as publicity shots from back in the day. No, the challenge here, and a significant one, is being able to do the GT40 justice. Add to that the Gurney family has given its blessing to the endeavor and you have a very steep mountain to climb. I’m up for it.
The initial steps for every car I draw are pretty much the same—set the wheel base, determine the wheel/tire diameter, and mark the total length. Once those are done, I pen in a simple profile outline. Contrary to what some might think, this isn’t something I can just copy from a photograph and drop into the illustration. No matter how clean a profile shot might be, there is always a fair bit of edge distortion to the images the makes the cars appear smaller than they really are so the profiles are all drawn by hand using various visual markers to help line things up. Even in those rare instances where the original designer’s drawings have been available, early on I discovered that there were often huge discrepancies between what had been drawn and what actually made it through production. The bottom line is there is no substitute for having the actual specifications available.
Evolution in Technique
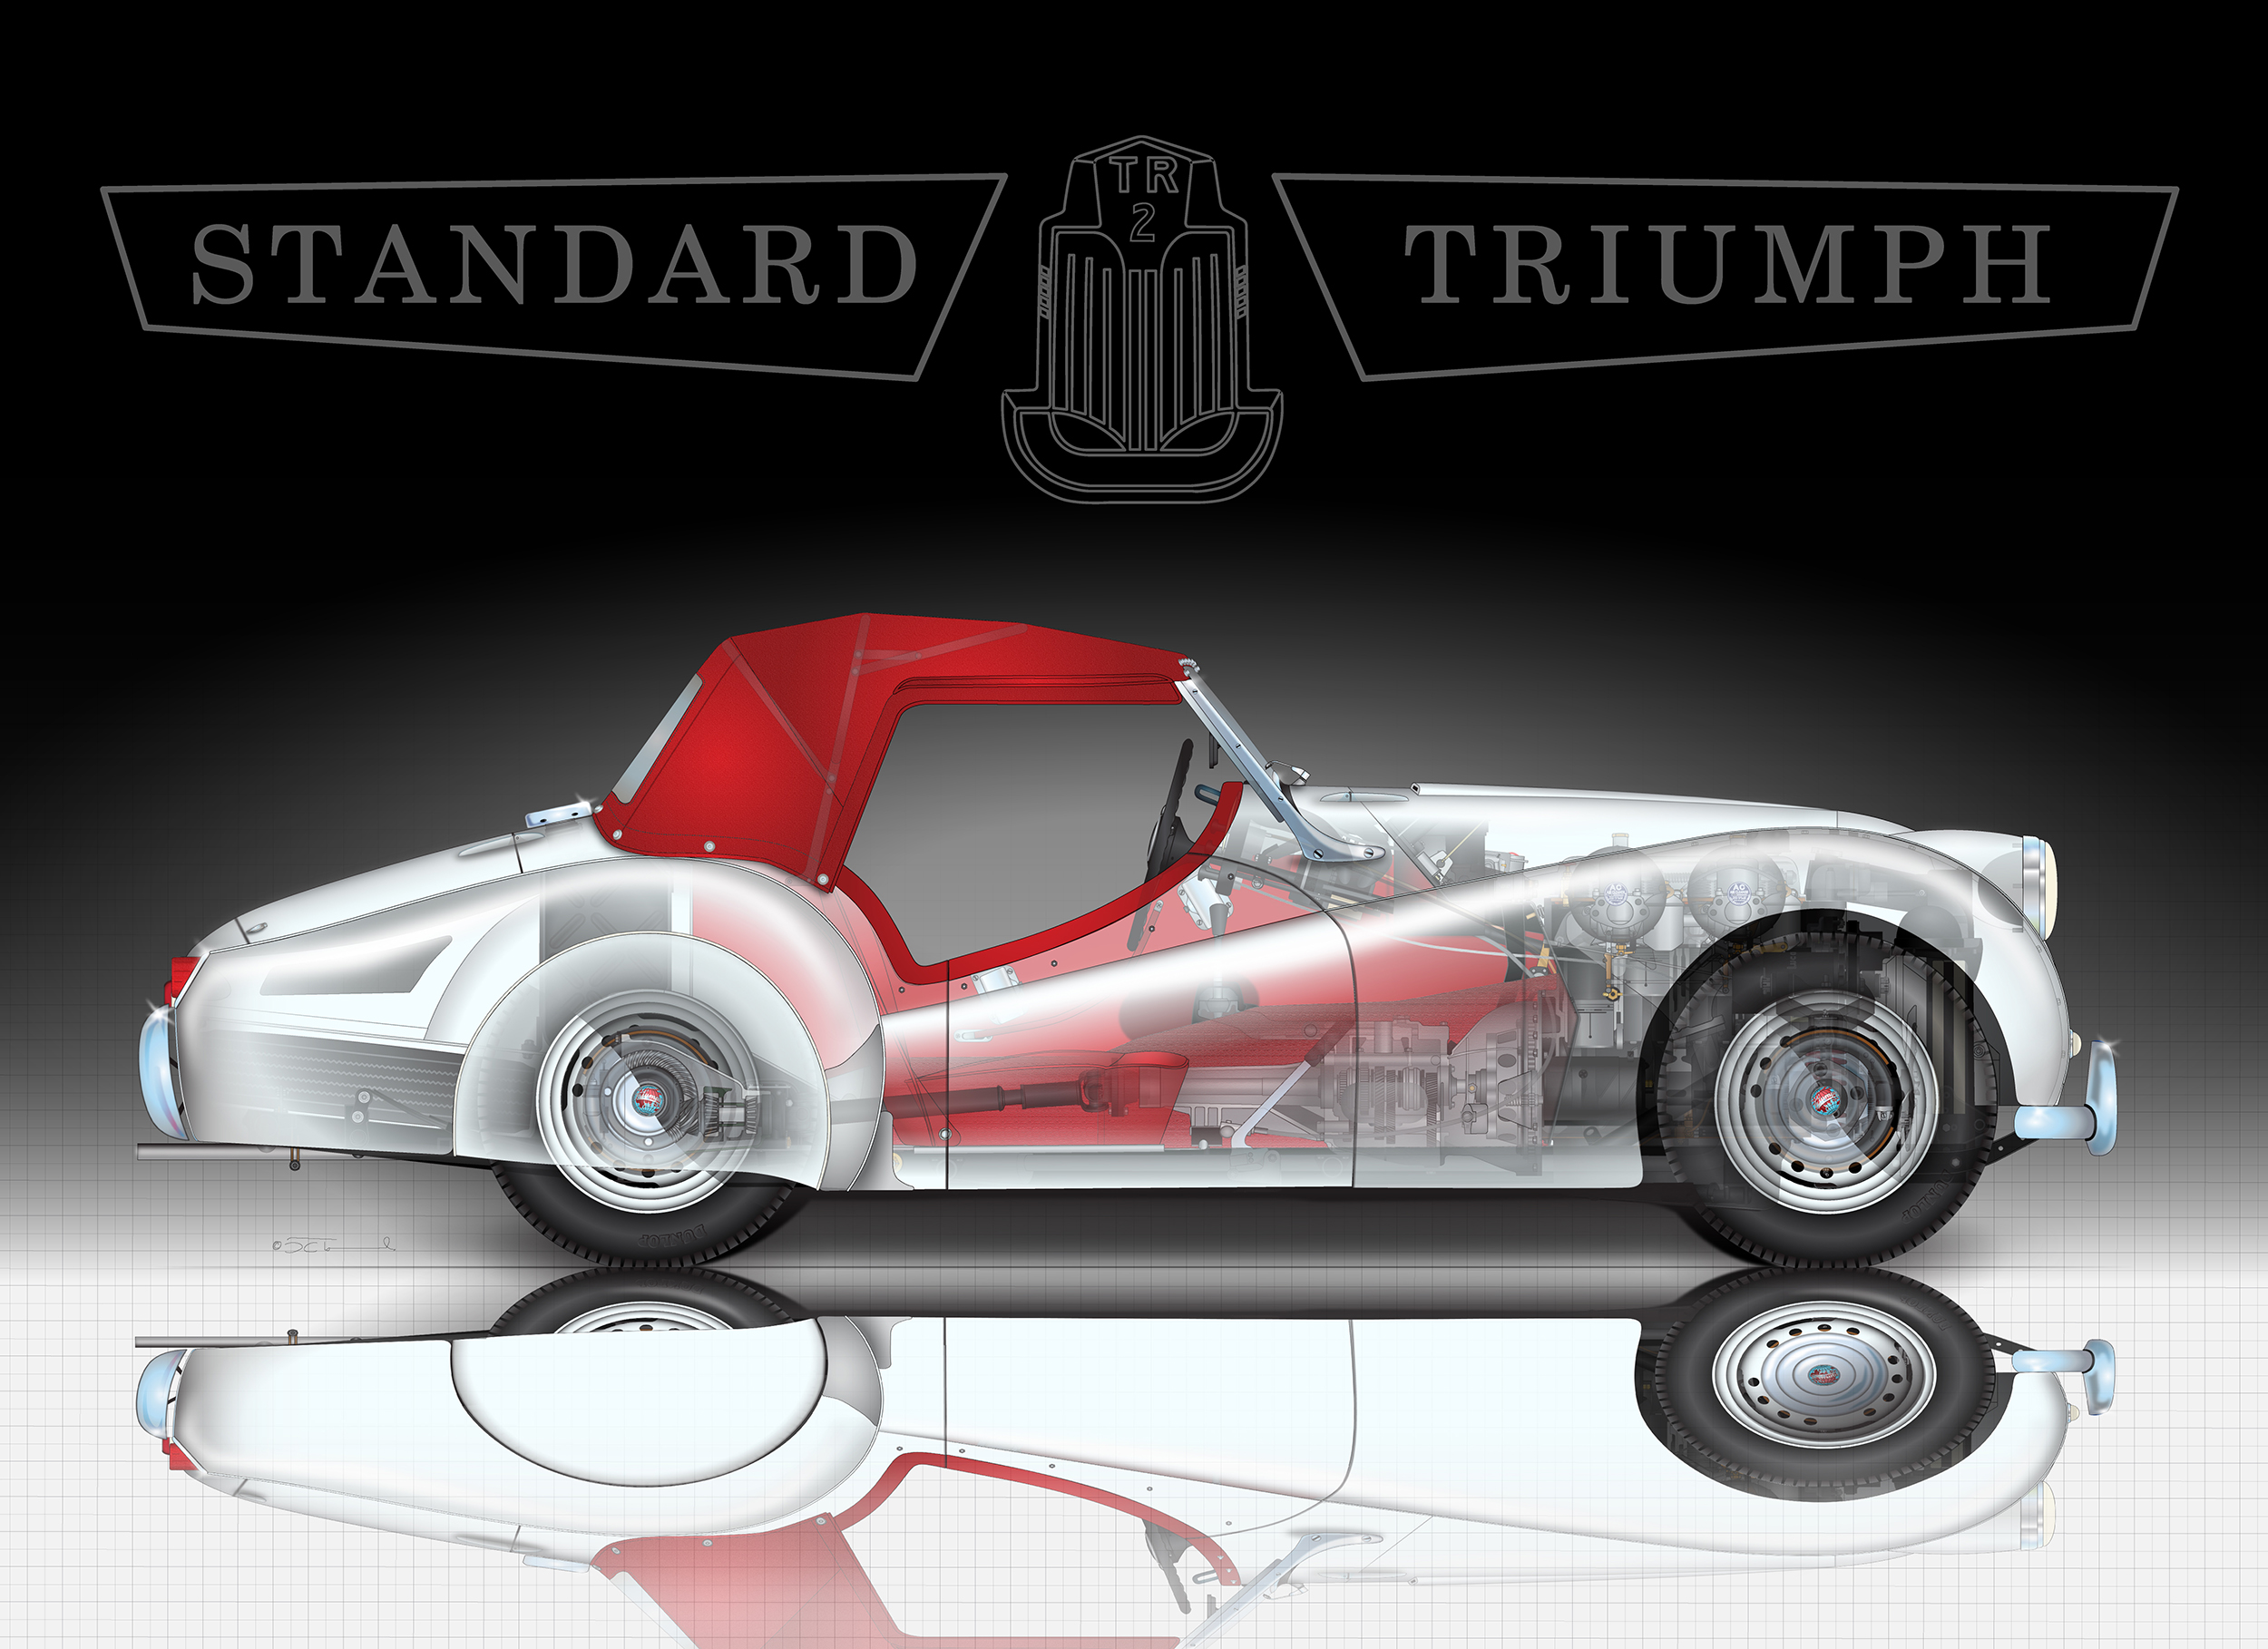
When I was first starting out, I used to draw my cars much like I might build them—ready the chassis, drop in the drive train, complete the body and finish up with the interior appointments. This system worked well for a quite a while but, as I kept developing and refining my transparency technique it became more difficult to achieve the result I was after using the ‘draw it like you build it’ method. However counter-intuitive it might seem, what finally delivered the look I was after was to reverse the order I drew things in—the body, highlights and external details come first, then the chassis and suspension bits, followed by the drivetrain and, lastly, the interior. While it exerts more pressure to be completely accurate when drawing the external shapes and details, the net result is vastly more pleasing.
Building the Image
The image sequence gives a sense of the development stream for the GT40.
- Frame 1—profile outline
- Frame 2—wheels and tires
- Frame 3—brakes
- Frame 4—windscreen, ‘a’ and ‘b’ pillars, upper door, side window, and side view mirror
- Frame 5—lower door, side hull, front wing, and headlamp
- Frame 6—sail panel and rear wing
- Frame 7—side stripes, number lamps, access doors, and sail panel air intake
- Frame 8—highlights and shadows
- Frame 9—initial transparency settings
Frames 7 through 8 are pretty straightforward illustration (other than the need to be as accurate as possible). It’s Frame 9 where the magic begins to happen. It starts with making a copy of all of the right side body panels and placing them at the beginning of the layer sequence (making them left side panels) then choosing a panel color that will give me a high degree of contrast (the more lurid the better) against the actual body color. Next steps are to turn off all of the right side body layers, the highlights, and any other bits that might distract me from setting the transparency values. What I’m left with is, in this instance, a very bright blue GT40 profile. Perfect for what I need to do next.
Tweaking Things
The general idea when setting the opacity levels to the various layers is to maintain the color integrity of the edges while leaving the bulk of each panel transparent—no mean feat when you’re dealing with a variety of disparate shapes. Because the technique involves using a combination of radial and linear gradients, the contrasting under color helps me to see the maximum transparency value of each panel and at which point that occurs, blending each smoothly into the other. Got all of that? No? Take heart, it’s taken me years to figure out how to be able to consistently replicate the effect so you can give yourself a break if the methodology isn’t completely clear. Once the basic panel values are set, I turn the highlight and shadow layers back on and adjust the opacity of each based on where it occurs—bits that occur where the transparency is greatest get turned down the most and those where the layer is the most opaque, the least. This gives me my baseline settings…all of which change as components are added and the illustration becomes more content dense.
Next Steps
Now that the foundation is laid, work begins on drawing in the drive train suspensions, tub, interior and other assorted bits and pieces. I don’t have any specific order I draw these in, rather it’s more based on whimsy than anything else, although there are certain components, like the steering and suspension, that fall naturally together.
-

- Frame 1
-

- Frame 2
-

- Frame 3
-

- Frame 4
-

- Frame 5
-

- Frame 6
-

- Frame 7
-

- Frame 8
-

- Frame 9
-

- Progress-4